Goal: self-portrait, hence, self-timer
Goal: Metering
For all these pics, I used a tripod. Tungsten WB. Flashed used with tissue.

- diffused flash with double-folded tissue
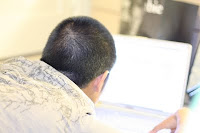
- spot-metered off this white laptop and adjusted the shutter speed to get +1 exposure bias.
- Aperture was set to F/11 so that I don't have to worry about blurring and focusing on wrong things. (See test 2 below for this).
- White laptop color is perfect. Nice exposure.

- Without Flash
- this is too dark and the color is too yellow from the low light.

- increased exposure bias to compensate for flash
- brighter , but still yellow from yellow room light and too dark in the room
- Increasing the exposure bias doesn't help to make the picture white.
- So use diffused flash from now on for all night shots or low light or indoor shots. That will make pics look like outside light.
Now I got metering. Time for me to step in after metering with a white reference is right.

- same settings as before
- spot- metered off white laptop, set to +1 EB and stepped in front of it.
-Not bad

This test is to verify that I can't meter off a background and use that setting on different background.
- spot-metered off the white laptop on a totally different background. Then moved the camera to have this frame, and lighting was different in those 2 backgronuds.
- Too exposed as expected.
- have to meter off the intended background. Can't meter off a white or skin-colored object against a different background and use that setting on another background.

- spot-metered on dark bag, and adjusted shutter speed until I get -2 exposure bias because I know that my face will be white once I stepped in and so I need to set the exposure down on the dark bag's reading.
- Viola! not bad at all. I'll call it good exposure.
Now, setting -2EB is something I don't usually do. So I'll forget. Let's use white obj to meter off because I just got that right in previous test.

- metered off a white laptop and set to +1 EB because I know from previous test that it'll expose the white laptop correctly. I also know that my skin won't be too far off from the laptop, so the exposure can't be too bad when I replace it with myself.
- I pressed the button, timing is counting. I replaced the white laptop with myself.
- Not bad. Good prediction/guesstimate. I've getting a grip on metering now.
- Color looks very similar to metering off the dark bag. How surprising that I got these right without needing to adjust the EB again once I calculated and set it to my estimate. My theory on metering is working. Re-read my thought process above on these 2 pics for this theory. I guess enough thinking is all I need so that I don't keep trying randomly.

- I can improve the color by metering off the obj with my skin color.
- I put the sofa with tan leather, metered off and set to get +1EB.
- replaced the sofa and (it doesn't matter if I remove the sofa before pressing the button or after)
- this is brighter
- 4sec compared to 2sec in previous pic.
- yellowish to my taste. Maybe my double-folded tissue was too thick. Should have tried removing one layer of tissue and see if it's whiter because of more flash light.

- Just to verify this above theory in setting to -2 off dark obj, now I set it to +1 bias metered off the same dark obj.
- Without me in the frame, this +1 would have been perfect on the dark bag.
- but with me, it's over exposed off my whiter skin than dark bag.
Take away from these two: metering off some objects on your behalf is tricky, especially if it's a dark object. Using white obj to meter off is much closer to normal process (setting to +1EV and shooting) . Best way, use an object same color as your skin to set the spot meter. Then just replace that obj with myself.
Self-portrait test is successful. I can take my own pics now. Recipe: spot-meter off a skin-color object in the place of the frame where I'll be after I jump in.
Test 2: Bokeh with self-timer
--------------------------------

Self-timer has focus problem. Once the shutter release button was pressed, the focus was set on the backdrop before I jumped in the frame. Then I became blurred even though I was much closer to the camera. I've tried not to move, and repeat this pic many time to have it focus on me once I jumped in the frame, but they all focus on the bag in the backdrop.

To verify this, I use Forever21 bag (so that there will be no question on motion blur). See the comparison. First pic is where I shoved the yellow bag (my behalf) in the frame while the 10 second is counting down. The focus was set on the blue back since the beginning, and the camera didn't refocus on closer yellow bag.

For second pic, I just left both bags where they are, and took with auto-focus. The camera focused on the nearer yellow bag, and now blue bag is blurred as it is supposed to be. Second picture is my goal, but I can't get it by stepping in the frame while the timer is counting down.
Therefore, I can't use self-timer to play with bokeh focus. I can't get my own self-portraits with Bokeh effect by using self-timer. The camera focus on whatever is there when the release button was pressed (10 second before it actually takes the picture) . 10 second timer doesn't refocus. Focus was set before the timer starts to count down.
Take away
1. Use Spot-metering with Manual
1.1. Metered off dark obj ==> set to
2. Always use diffused flash for all night-shots and indoor-shots with low light.
3. For self-portraits, use an object same color as your skin to set the spot meter. Then just replace that obj with myself.
4. Bokeh effect doesn't work with self-portraits unless the main focus (me) can be in the frame while the shutter button was pressed. Need remote release for this purpose.
5. have to meter off the intended background.
6. In pic properties in computer, exposure bias is always 0 for manual mode. Don't take that number as it's definitely not 0 as I set it to +1 for most of these pics. I need to write down that bias right after I take each pic. But for Av and Tv mode, the info has it right.
7. Double tissue was too thick. Use one layer of two-ply only.
 - spot-metered off Un's side face, +1EB (since I know it's dark and I want it brighter than 0EB setting, which would have been how I see with my eyes in the dark)


