
Ctrl + J to duplicate the background layer (just in case)
Filter -> sharpen -> unsharp mask (This will sharpen the whole image)
Amount as ~ 100%
Use small radius like 2 pixels
Leave the threshold as 0
NOw if I don't want the whole image to be sharpen, proceed with the following step for selective sharpening
- On that layer we just did unsharpen mask, create a layer mask.
- Then Ctrl + I to invert. The layer mask will be black. Black means the effect (of unsharpen mask) is not there. White layer mask means the effect is there. NOw with black layer mask, the image is back to the original blurred background because the blask mask hides the effect.
- X to change between black and white.
- Use white to selective have the effect on selective regions.
- use a paint brush and start painting the selective regions with white brush. Those regions will have the effect of 'unsharpen mask' we just did before. The rest will be the same as background.
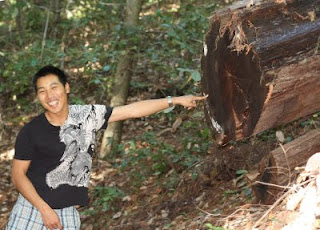
This technique was used on Un and the tree trunk on the image above. It sharpens his body that was blurred before.
Good tutorial on different ways of sharpening: http://www.youtube.com/watch?v=Dg8B5pcugvs
No comments:
Post a Comment